Setting up a data structure
The basic concepts needed to set up the data structure is explained in this section. The goal is to provide an initial understanding of the functionality without delving too deeply into the details. Types are an optional concept and are not explained here.
Adding an asset
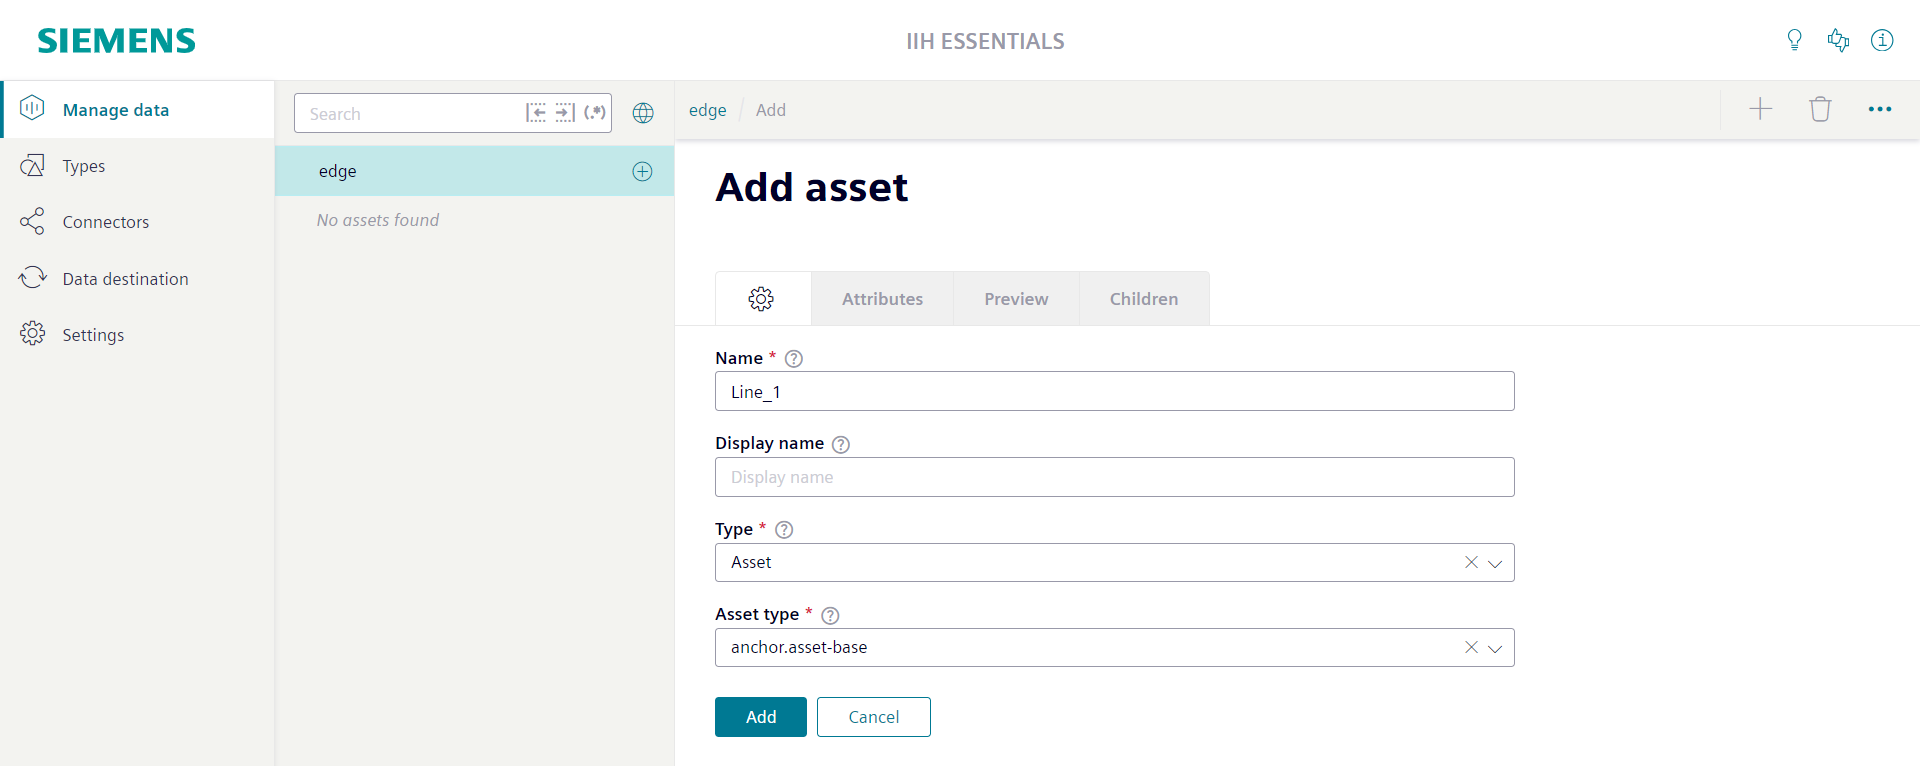
The section "Manage Data" is used to set up the asset hierarchy. The root asset of the hierarchy is the asset with the name edge. It is created automatically by the system and can not be deleted or modified.

- To add a new asset select its parent asset in the navigation area.
-
Click the plus button.
A screen with the title "Add asset" is opened. The only mandatory information you have to enter is the "Name" of the asset.
-
Click the "Add" button to create the asset.
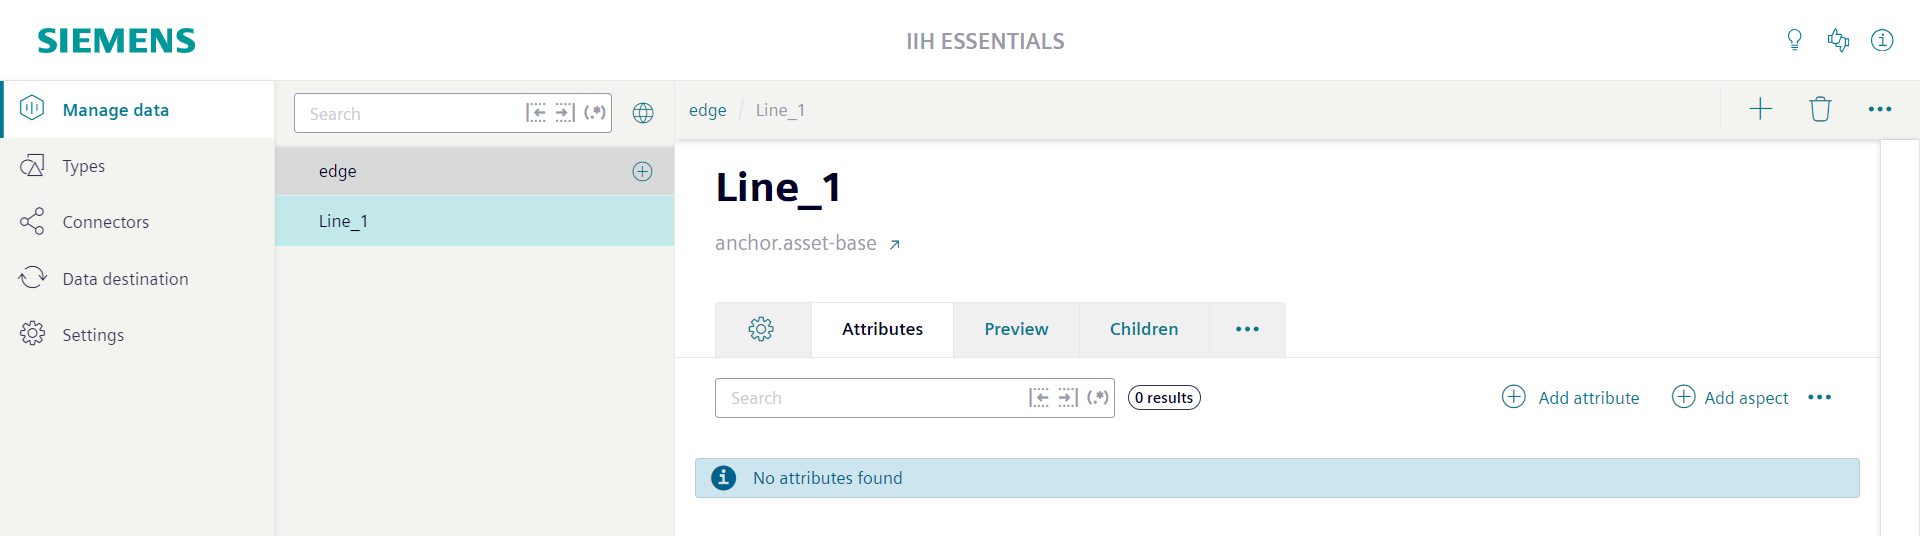
The created asset is selected in the navigation area. Its "Attributes" tab is opened.
-
To add a new child asset to the currently opened asset click the plus button in the top right corner.
The created child asset is selected in the navigation area. Its parent asset became the new top asset in the navigation area.

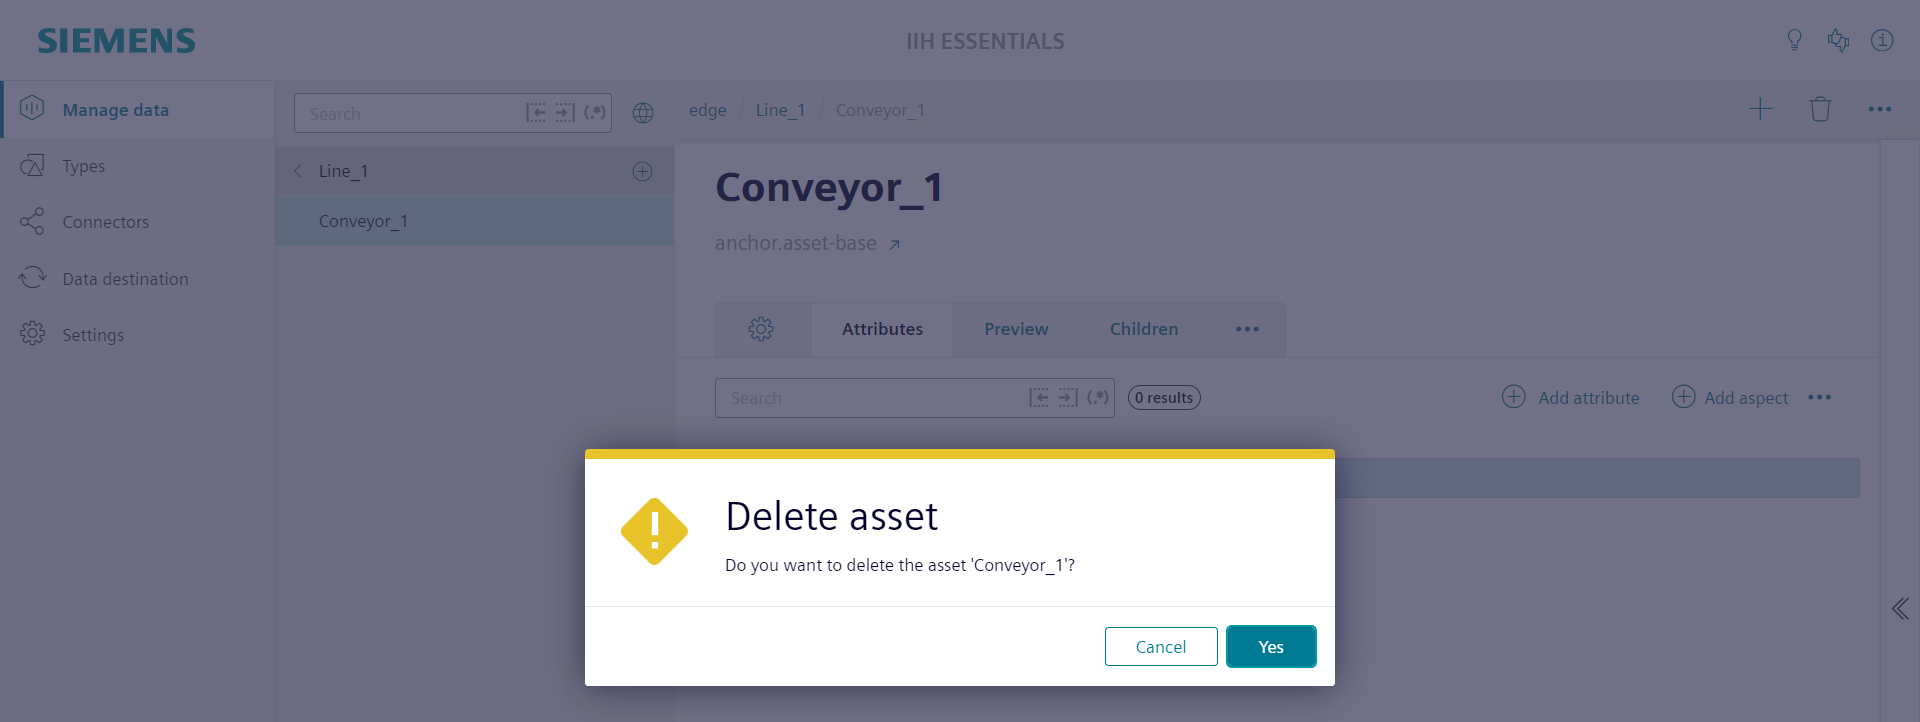
Deleting an asset
- To delete an asset select it first in the navigation bar.
-
Then click the delete icon in the top right corner.
All child assets of the selected asset will also be deleted.
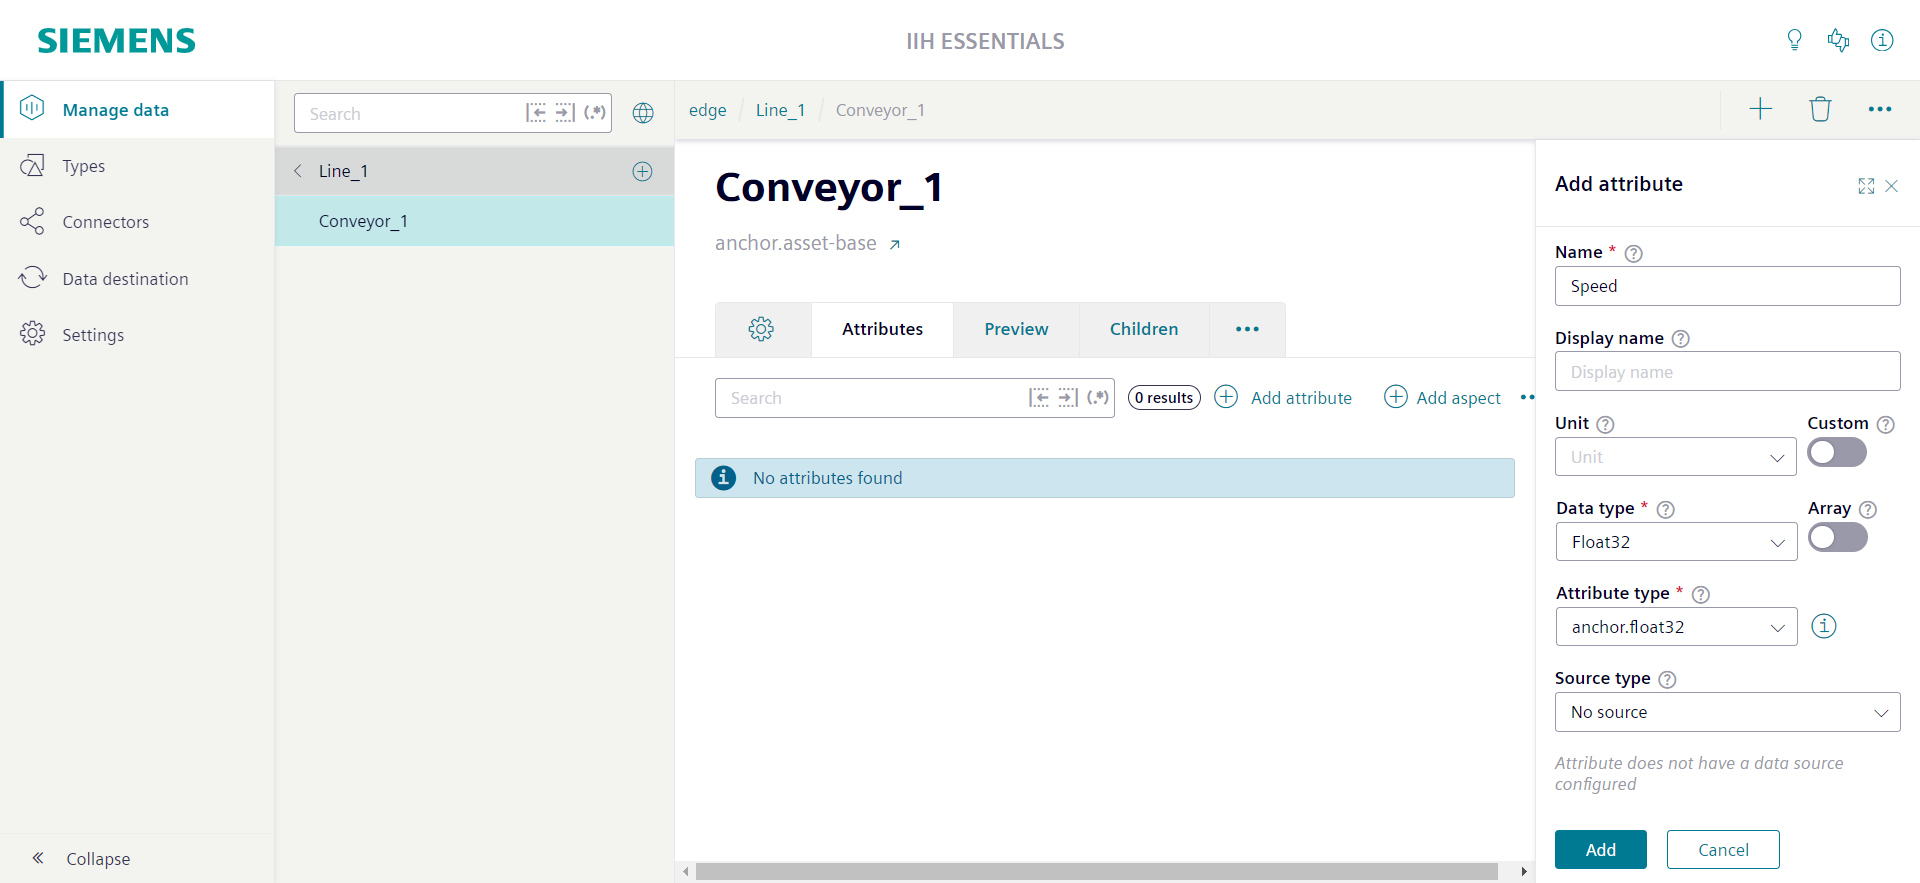
Adding an attribute
- To add an attribute to an asset first select the asset.
- Open the tab "Attributes".
-
Click the button "Add attribute".
The "Add attribute" sidebar appears. The only mandatory information you have to enter is the "Name" of the attribute and the "Data type" of the attribute.
-
Click the "Add" button to create the attribute. The "Add attribute" sidebar can be closed with the "X" button in the top left corner.
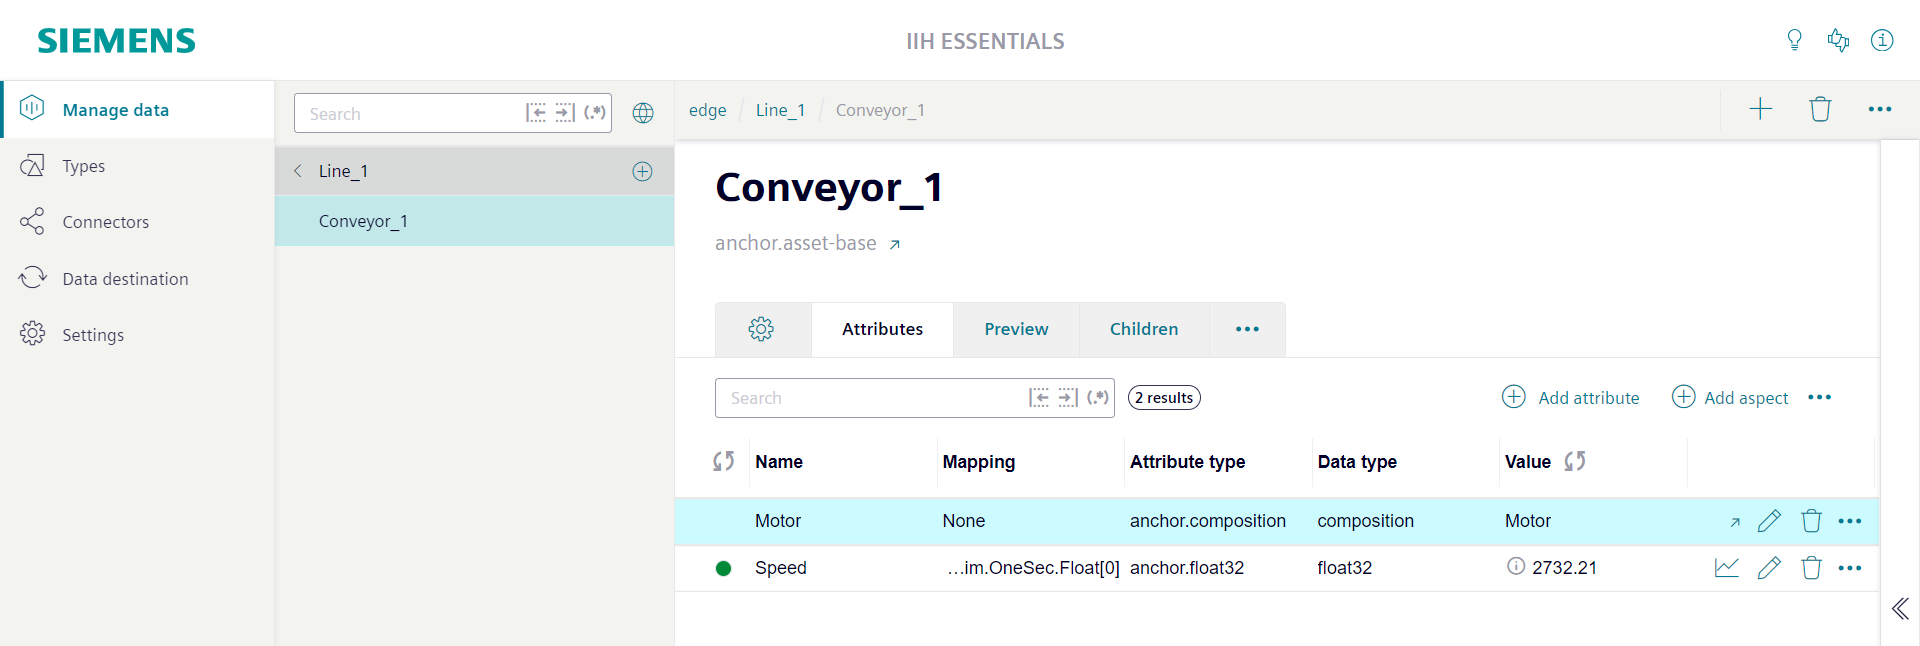
The created attribute will be displayed in the list of attributes. The attribute is not already mapped to a tag of a connector. The state column shows a grey icon.

Mapping an attribute
To map the attribute to a tag of a connector the "Tags" sidebar is used:
- Click the collapsed "Tags" sidebar at the right side of the screen indicated via the "<<" symbol. The "Tags" sidebar is opened.
- In the top section of the "Tags" sidebar a connector and a connection must be selected.
- In the bottom section of the "Tags" sidebar all tags of the selected connection are displayed. With the search field you can filter the list of displayed tags.
-
Drag and drop the tag at the attributes "Name" column.
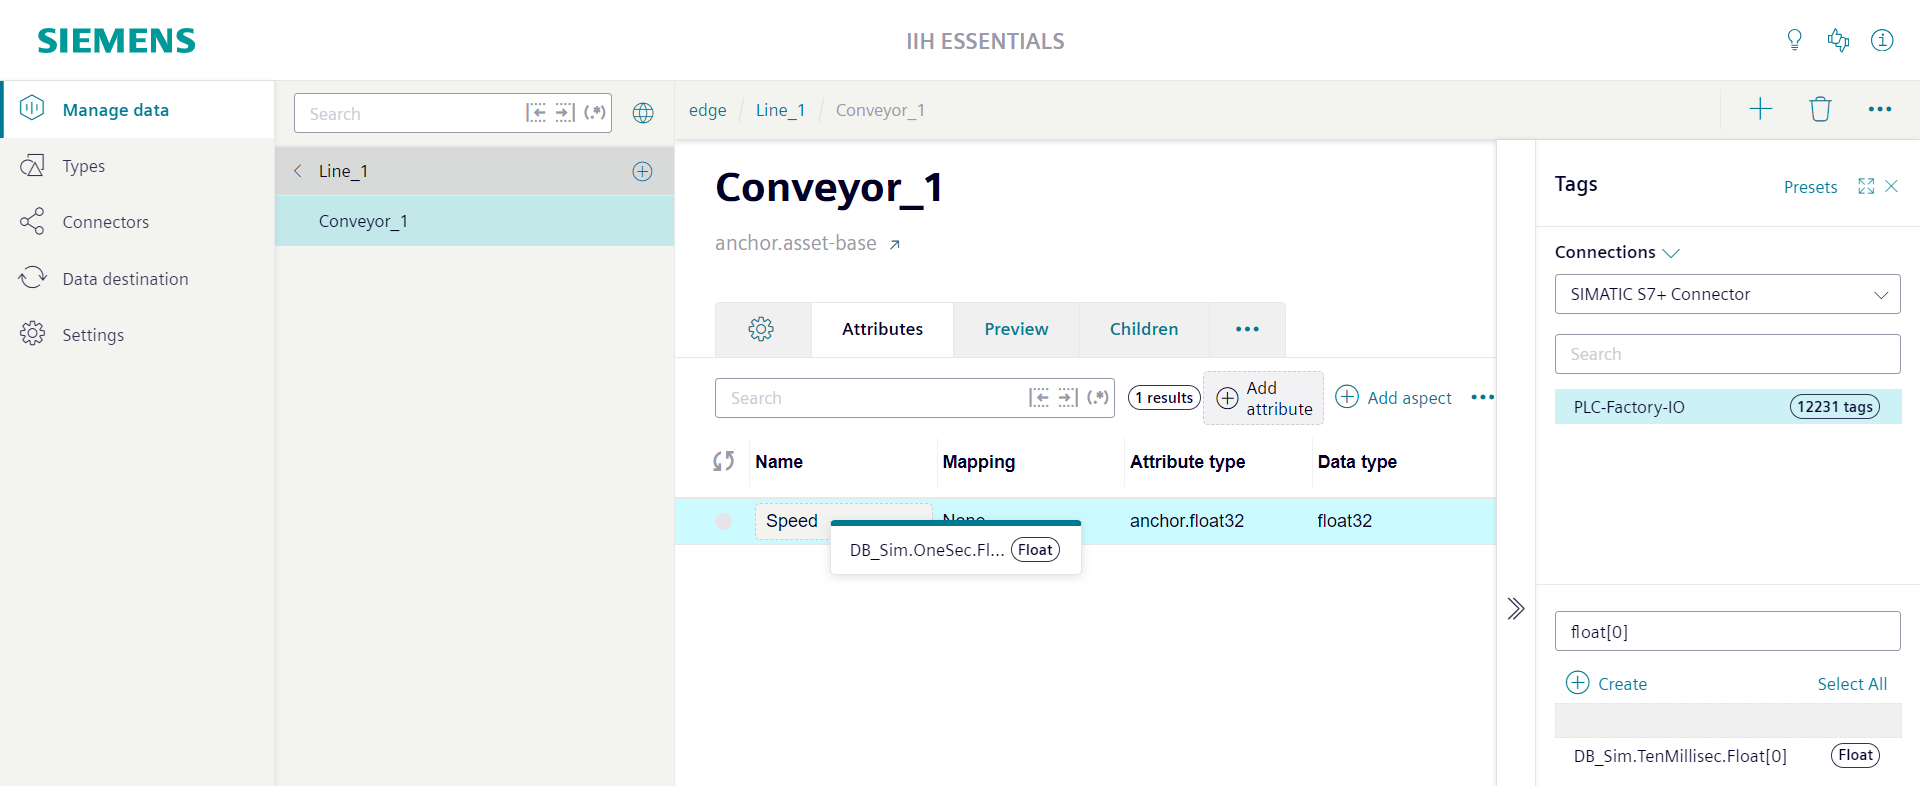
The selected tag gets mapped to the attribute. The full name of the tag including connector name, connection name and tag name is displayed in the "Mapping" column. The state indicator turns into green. The most recent value of the tag will be displayed in the "Value" column.

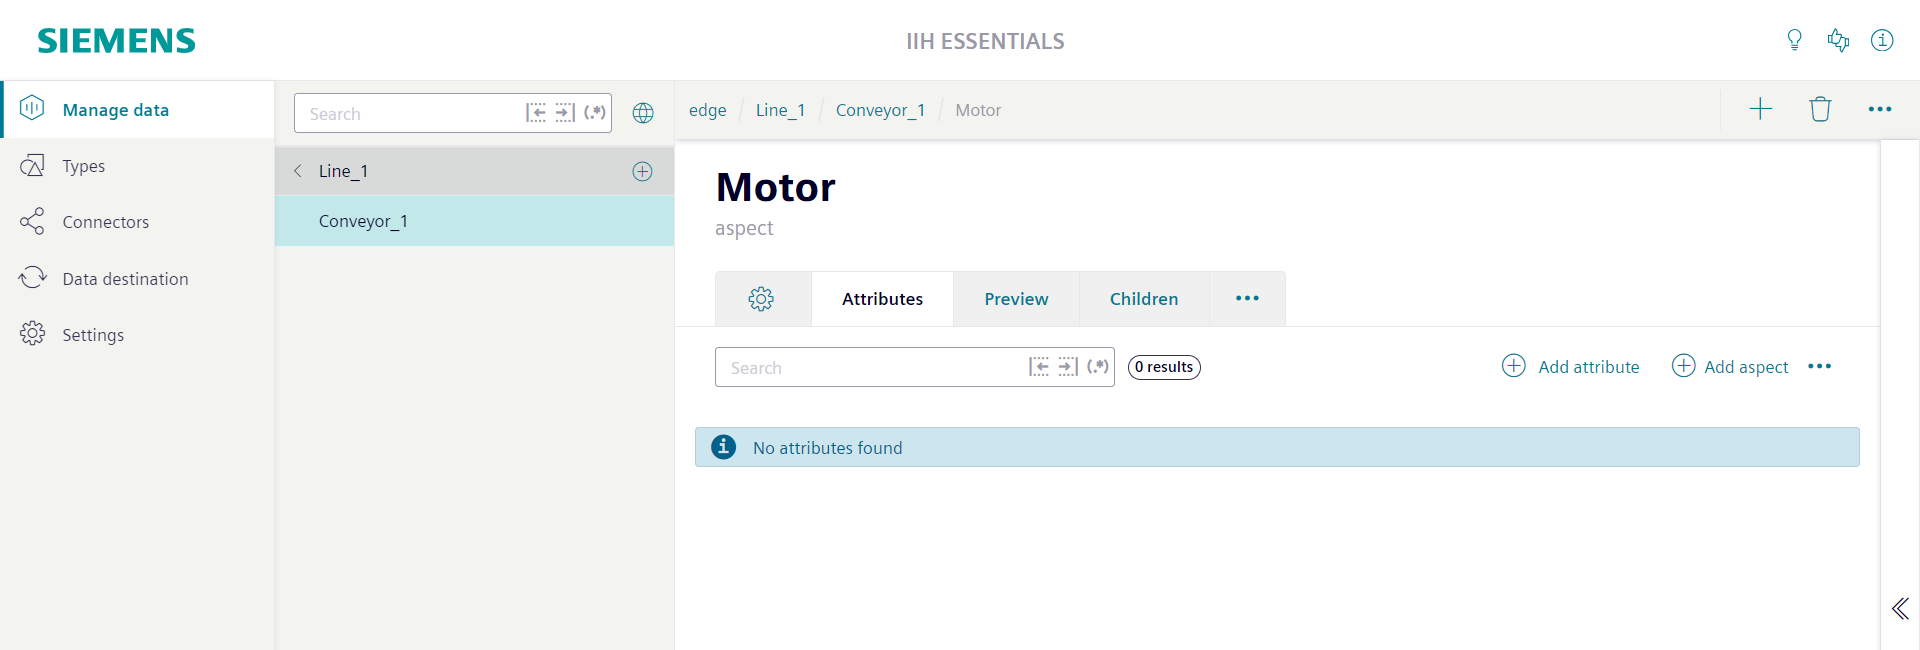
Adding an aspect
- To add an aspect to an asset first select the asset.
- Open the tab "Attributes".
-
An aspect has to be linked to an asset using a special attribute of datatype composition. Click the button "Add aspect".
The "Add aspect" sidebar appears.
The only mandatory information you have to enter is the "Name" of the attribute. This name will also be used as name of the aspect to generate. 1. Click the "Add" button to create the attribute. The "Add aspect" sidebar can be closed with the "X" button in the top left corner.

The created attribute will be displayed in the list of attributes. The "Value" column of the attribute shows the name of the created aspect.
-
Open the aspect itself with the link button.
The aspect is an integral part of the asset. It is not shown in the navigation area. The breadcrumb shows the current location of the opened aspect. The breadcrumb can also be used to navigate back to the asset owning the aspect.